


The Ultimate Guide to Using Dado Blades in Woodworking
Dado blades are essential tools for any serious woodworker. These specialized saw blades allow you to create precise grooves, or dados, in wood, opening up a world of possibilities for construction, joinery, and decorative work. Whether you're building cabinets, shelves, or simply adding intricate details to your projects, understanding how to use dado blades effectively is crucial. This comprehensive guide will equip you with the knowledge and techniques to confidently incorporate dado blades into your woodworking endeavors.
Understanding Dado Blades
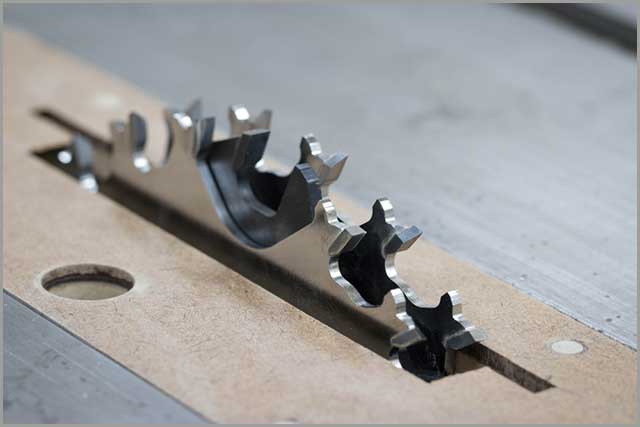
A dado blade is essentially a stack of thin, circular saw blades mounted on a common arbor. Each blade has teeth designed for specific cutting functions, and the combined configuration creates a groove of a predetermined width and depth. The most common type of dado blade is a "stack" blade, where the individual blades can be rearranged to achieve different groove sizes. Some blades come pre-configured with specific groove widths.
The Benefits of Using Dado Blades
Dado blades offer several advantages over traditional methods like routering or hand-cutting grooves:
- Precision and Accuracy: Dado blades create perfectly straight and uniform grooves, ensuring tight-fitting joints and a professional finish.
- Speed and Efficiency: Cutting dados with a dado blade is significantly faster than other methods, especially for larger projects requiring numerous grooves.
- Versatility: With their ability to adjust blade spacing and configuration, dado blades offer immense versatility in creating various groove sizes, shapes, and depths.
- Safety: When used correctly, dado blades provide a safer alternative to using a router, minimizing the risk of kickback or other accidents.
Setting Up Your Dado Blade
Before you start cutting, it's essential to set up your dado blade correctly. This involves choosing the right blade for your project and adjusting the blade spacing to create the desired groove width. Here's a step-by-step guide:
Choosing the Right Blade
Dado blade sets are available in various sizes and tooth configurations. Consider the following factors when selecting a blade:
- Groove Width: Determine the width of the groove you need to cut. Most sets offer a range of groove widths, but you may need specific blade configurations for wider dados.
- Tooth Count and Configuration: The tooth count and arrangement affect the cutting speed and finish. A higher tooth count provides a smoother finish but may cut slower. Consider the type of wood you're working with and the desired outcome.
- Arbor Size: Ensure the blade's arbor size matches your table saw. Most dado blades use a 5/8-inch arbor.
Adjusting Blade Spacing
Once you have your blade, it's time to adjust the spacing to create the desired groove width. This involves carefully positioning the individual blades within the stack.
- Start with a Narrow Setting: Begin by setting the blades close together to create a narrow groove.
- Use Shims: Use thin shims, like those made from paper or thin cardboard, to carefully increase the spacing between the blades.
- Measure and Adjust: Measure the width of the groove after each adjustment. Continue adding shims until you reach the desired groove width.
- Secure the Blades: Once the blades are positioned correctly, tighten the locking collars securely to prevent movement during cutting.
Cutting Dados with a Dado Blade
With your dado blade set up correctly, you're ready to create those grooves! Follow these steps to ensure safe and precise cuts:
Safety First
Using a dado blade requires extra caution due to the increased cutting depth and potential for kickback. Always prioritize safety by following these guidelines:
- Use Safety Glasses: Protect your eyes from flying debris.
- Secure the Workpiece: Use a push stick or feather board to guide the wood securely through the blade.
- Start Slowly: Begin cutting at a slow feed rate, gradually increasing the speed as you become comfortable.
- Never Reach Over the Blade: Keep your hands and fingers away from the blade's path.
- Use a Blade Guard: If your table saw has a blade guard, make sure it's in place during operation.
Cutting the Dado
Now, let's cut that dado!
- Mark the Cut Line: Use a pencil to mark the precise location for your dado on the workpiece.
- Make a Test Cut: Before cutting the full depth, make a shallow test cut to ensure the blade is properly aligned and the groove width is correct.
- Cut in Stages: Cut the dado in multiple passes, gradually increasing the depth until you reach the desired measurement.
- Support the Workpiece: Use a fence or a support board to provide stability to the workpiece, especially when cutting dados near the edge of the wood.
- Clean Up: Once the dado is cut, use a chisel or a scraper to remove any burrs or imperfections from the groove.
Tips and Techniques for Using Dado Blades
Here are some additional tips to maximize your success and achieve professional-quality dados:
- Blade Maintenance: Regularly inspect your dado blades for any signs of wear or damage. Replace worn blades promptly for optimal performance and safety.
- Cutting Plywood: When cutting dados in plywood, avoid exceeding the depth of the top layer. This ensures a clean cut and prevents splintering.
- Creating Rabbets: Dado blades can also be used to create rabbets, which are rectangular grooves along the edge of a workpiece. By using a dado blade with a wider cutting capacity, you can create rabbets for various applications.
- Experimentation: Don't be afraid to experiment with different dado blade configurations and cutting techniques to achieve unique results.
Conclusion
Dado blades are powerful tools that can unlock a wide range of woodworking possibilities. By understanding their operation, mastering setup techniques, and prioritizing safety, you can confidently create precise grooves and elevate your woodworking projects to new heights. Embrace the versatility of dado blades, and let your imagination guide you to create stunning and functional woodworking masterpieces.


0 comments:
Post a Comment
Note: Only a member of this blog may post a comment.